Did you hear that? That sudden bang behind the bathroom wall or the weird rattling sound every time you turn off the kitchen faucet? If your Nanaimo home sounds like it’s hosting a drum solo every time you use the tap, you aren’t alone.
While it might just seem like a minor annoyance (ok maybe it is super annoying), those sounds are usually your plumbing’s way of screaming for help. Before a small rattle turns into a flooded basement, let’s look at why your pipes are making a racket and what you can do about it.
What’s Making All That Noise?
In many Nanaimo homes, especially our beautiful older properties, noisy pipes are a common symptom of a few specific issues:
Water Hammer: This is that loud “thump” or “bang” you hear when you turn off a tap quickly. It happens when the rushing water has nowhere to go and slams against the shut-off valve, sending a shockwave through your system.
Pressure Changes: If the water pressure in your home is too high, it can cause your pipes to vibrate or whistle as the water forces its way through.
Loose Mounting Straps: Sometimes, the solution is as simple as a loose screw. If your pipes aren’t strapped down tightly to the floor joists or wall studs, they’ll rattle every time water moves through them.
Easy DIY Fixes to Try First
Before you search for a Nanaimo plumber, there are a few things you can check on your own:
Insulate Your Pipes: For homes on the coast, adding foam insulation around your pipes can do wonders. Not only does it help keep your water warm, but it acts as a muffler to dampen those rattling sounds.
Check the Straps: If you have access to your pipes in a basement or crawlspace, check to see if any are hanging loose. Adding a few inexpensive plastic or metal pipe straps can stop the “rattling” in its tracks.
Reset Your Air Chambers: If you have older plumbing, you might have air chambers designed to prevent water hammer. Turning off your main water supply, opening all your faucets to drain the system, and then turning the water back on can sometimes “refill” these air pockets and stop the banging.
Why You Shouldn’t Ignore the Noise
It can be tempting to just turn up the TV to drown out the sound (we’re not judging you), but it is always better to be preventative than to ignore a problem until it ends in yet another disaster.
Those vibrations and “hammers” aren’t just loud; they are physically stressing your pipes. Over time, that constant movement can weaken joints, leading to a burst pipe—and nobody wants to deal with a midnight flood.
When to Call the Professionals
If you’ve tried the basics and your house still sounds like a construction site, it’s time to bring in the experts. Some issues, like faulty pressure-reducing valves or deep-system vibrations, require professional tools and a bit of plumbing “detective work.”
John G. Plumbing Inc. is your go-to team for everything from minor rattles to full home repiping. We are locally owned and proud to serve the Nanaimo community with friendly, affordable, and reliable service.
Give us a call today to restore your peace of mind and get some much-needed peace and quiet back in your home.
John G. Plumbing Inc provides plumbing services to the city of Nanaimo, including neighbourhoods such as North Nanaimo, Departure Bay, Harewood, Chase River, Pleasant Valley, Hammond Bay, and the Old City Quarter.
If you own a home in Nanaimo, Parksville, or Qualicum Beach, you may have recently received a startling notice from your insurance provider: a demand to replace your plumbing or face the immediate cancellation of your policy.
Across Vancouver Island, the “Poly-B” crisis has become the single biggest anxiety for local homeowners. It is no longer just about the risk of a leak; it is a legal and financial hurdle that can threaten your mortgage and your home’s resale value.
Why the Sudden Change?
Insurance companies have grown increasingly risk-averse regarding Polybutylene (Poly-B) piping, a grey plastic plumbing used extensively in Mid-Island homes between the 1970s and 1990s.
Because this material is prone to sudden, catastrophic failure, insurers are taking drastic measures to mitigate their liability:
• Many providers are now flatly refusing to renew policies for homes with Poly-B until the system is fully replaced.
• For those who can find coverage, many are being hit with “water damage deductibles” ranging from $5,000 to $10,000.
• Since home insurance is a requirement for most Canadian mortgages, a cancelled policy can put your entire financing at risk.
Identifying the Risk: “Good” vs. “Bad” Poly-B
One of the most common knowledge gaps among Nanaimo residents is whether their specific system is high-risk. When insurance companies ask “Poly B and home strata insurance questions,” they are primarily looking for one thing: the fittings.
• “Bad” Poly-B: Systems using plastic fittings are considered high-risk and are the primary target for insurance cancellations.
• “Good” Poly-B: Systems with copper fittings are generally considered lower risk, though many insurers are moving toward a “replace-all” mandate regardless of the fitting type.
The Path to Insurance Compliance
For many, the only way to satisfy an insurance provider and maintain a manageable deductible is through Insurance-Approved Poly-B Replacement. While the cost of full-house remediation is a major financial pain point—often quoted at $10,000 or more*—it is a critical investment in your property’s “due diligence” profile for future sales.
The repiping process typically involves:
1. Specialized Assessment: Determining the scope of the remediation.
2. Removal and Replacement: Swapping out the grey plastic for modern, durable alternatives.
3. Certification: Providing the necessary documentation to your insurer to prove the risk has been eliminated.
*Worried about the financial cost? John G. Plumbing has a solution. We offer third-party financing, meaning instead of a huge bill needing to be paid at once, you can pay over time in smaller, monthly payments.
Why Choose a Local Specialist?
When dealing with insurance compliance, the quality of parts matters. At John G Plumbing, we understand the local market’s preference for professional-grade parts sourced from wholesalers rather than “Big Box” stores. This ensures your new system carries the best possible warranties and meets the highest local building code standards.
Whether you are preparing a property for sale or trying to lower your premiums, don’t wait for a leak to happen.
Are you facing insurance pressure due to your plumbing? Contact our team today for a professional evaluation and a transparent, flat-rate quote for Poly-B remediation cost.
If your home was built between the late 1970s and mid-1990s, you may have a ticking time bomb hidden behind your walls: Polybutylene (PolyB) plumbing. This gray plastic piping was once hailed as the “pipe of the future,” but its eventual widespread failure has made it a major financial and structural risk for homeowners. The worst part? Many homeowners don’t know they have this unless it was installed while they were around, or had a thorough home inspection. Worst-case scenarios, they find out when it’s too late, and burst pipe damage has been done.
At John G. Plumbing Inc., we specialize in identifying and safely replacing this hazardous material across Nanaimo, Parksville, Coombs, and Qualicum Beach.
How to Identify Polybutylene (PolyB) Plumbing in Your Home
PolyB piping is a grey or blue plastic pipe, usually about 1/2-inch or 3/4-inch in diameter. It is often found connected with either plastic or brass fittings.
Where can I find PolyB pipes in my house?
PolyB was used throughout the entire water delivery system. You can often spot it in accessible, unfinished areas:
Near the Water Heater: This is one of the most common places to confirm its presence.
Unfinished Basements/Crawl Spaces: Look for pipes running along floor joists or walls.
Where Pipes Penetrate Walls: Check near the main water shut-off valve.
Not sure and prefer a professional eye? Give John G. Plumbing a call at (250) 797-0858, and we’ll take a look.
What are the warning signs of PolyB pipe failure?
PolyB doesn’t typically fail all at once; it degrades slowly, giving you crucial warning signs:
Pinhole Leaks: Small, localized leaks that appear suddenly, often near joints or fittings.
Fittings Discoloring: The plastic fittings, especially, may start to look chalky or develop micro-fractures.
Sudden Drop in Water Pressure: This can indicate a larger leak behind a wall or under a slab.
Repeated, seemingly random leaks in different locations.
But when it does decide to go, it goes hard. Often, these warning signs are not visible because they are hidden behind walls, so most homeowners don’t get adequate warning. Hence, its nickname is a ticking time bomb in your walls.
Why does Polybutylene piping fail?
The failure of PolyB is not due to physical wear and tear, but rather a slow, internal chemical breakdown that makes the entire system unreliable.
What makes PolyB pipes react to chlorine in tap water?
The chlorine and other disinfectant chemicals added to public water supplies (which are essential for health) are the enemy of PolyB. These chemicals react with the plastic material from the inside out, causing chemical degradation. Over time, the pipe material becomes brittle and begins to flake or spider-web, starting at the fittings and eventually leading to catastrophic failure.
Depending on your town or city’s water treatment process, the amount of chlorine and other chemicals can vary throughout the year. The amount used also varies based on your location.
What is the difference between PolyB and PEX piping?
It is crucial not to confuse PolyB with PEX (cross-linked polyethylene), which is a modern, flexible, and reliable plastic piping solution.
PolyB (Bad)
Usually dull gray or blue; often marked with “PB.” It is chemically susceptible to chlorine.
PEX (Good)
Usually bright red, blue, or white; marked with “PEX.” PEX is designed to resist chemical degradation and has a proven track record. Often, PolyB pipes are replaced with reliable PEX pipes.
The Solution: Replacement, Insurance, and Value
PolyB is not an issue that can be permanently fixed with spot repairs. The entire system is compromised. It’s a waste of time and money to replace only a small portion of your PolyB pipes with PEX because it won’t solve the problem in the long run.
Can a PolyB pipe be repaired, or must it be replaced?
While a temporary repair can stop a leak today, it only addresses one symptom of a system-wide illness. Because the chemical degradation is happening throughout the pipe’s length, another leak will inevitably occur nearby soon. Temporary repairs are not advised.
Imagine you just bought the home of your dreams. You got it for a good deal and have a few renovation ideas in mind. But you didn’t get a house inspection. Little do you know that the home has PolyB pipes. At first, you move in, and things go great. You organize your furniture, start decorating, and think of ideas for renovating to really make the space yours. Then, the worst thing happens – your pipes burst. Not only is there extensive damage to your wall, but it has also incurred a huge repair cost. Now you’ve realized, without notice, that you have to repipe your home and repair the existing damage done from these PolyB pipes.
But, isn’t it expensive to repipe my house?
It can be pricey, but it’s an investment with so much value. Not only will it help get your home insured in case something more terrible happens (housefire, anyone?), but the replacement pipes last a very long time.
John G. Plumbing is a family business located in Coombs. We get it, life can be expensive. Unexpected expenses tend to pop up whenever they want, and it can be difficult to manage. That’s why we’re happy to have partnered with FinanceIt – a third-party financing platform. This means you don’t have to pay your entire bill in one shot. Instead, you can split it up into manageable, monthly payments. Ease of mind, and a little easier on the wallet each month. We are happy to provide a free estimate and chat about financing options before replacing a single pipe.
What is the only permanent solution for PolyB pipes?
The only safe, permanent solution is a full repiping and replacement of the entire PolyB system with modern, reliable materials like PEX or Copper. This process removes the source of the risk entirely, restoring the safety and value of your home.
How does PolyB plumbing affect home insurance?
Having PolyB plumbing can severely impact your ability to get standard homeowners’ insurance. Insurers often see it as an unacceptably high risk for future water damage claims. This can result in:
High Premiums: Insurance companies may charge significantly more.
Denied Coverage: Some carriers will refuse to insure a home with PolyB outright.
Mandatory Replacement: Before buying or selling, many banks and insurance companies will require a full repipe.
On Vancouver Island, most home insurance companies will not insure your home if it contains PolyB plumbing.
Get your free PolyB pipe replacement estimate from John G.
If you suspect you have PolyB plumbing, don’t wait for a major leak to occur. John G. Plumbing Inc. offers comprehensive plumbing inspections and professional full-house repiping services in Nanaimo, Parksville, Coombs, and Qualicum Beach.
Plumbing leaks are every homeowner’s nightmare. They waste staggering amounts of water, increase your utility bills, and can cause devastating structural damage and mold growth if ignored.
At John G. Plumbing Inc., we know that quick action is key. We’ve structured this guide to help you manage the emergency, identify common issues, and know exactly when it’s time to call our professional plumbers. When in doubt, give us a call at (250) 797-0858.
What’s in this guide?
What to do when a pipe unexpectedly bursts in your home.
How to fix a leaky faucet.
How to identify your faucet type.
Toilet won’t stop running? Common causes and quick fixes.
Pipe burst? Shut off the water first.
When you hear the terrifying sound of rushing water, panic is natural, but immediate action is critical. Stopping the flow of water is the single most important thing you can do to save your home.
Your absolute first priority is to turn off the water supply.
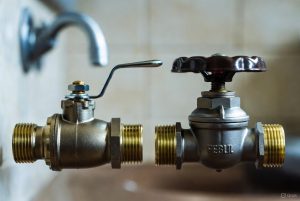
Water shut-offs are usually either a ball valve or a gate valve style
How to find your main water shut-off valve
Interior Location: In most homes, the main shut-off valve is located near the perimeter of the house where the main water line enters. Check your utility room, basement, or crawl space, often near the water heater. Do you have a hose outside? Look in the basement near where it is set up, the shut-off valve might be close by.
Exterior Location: If you can’t find a valve inside, look for the curb stop (the municipal shut-off) in a concrete or plastic box near your property line. You may need a specific tool (or a service call from a plumber) to turn this off.
What to do if a pipe bursts (Emergency steps)
Turn Off the Water:
Use the main valve immediately.
Turn Off the Power:
If the leak is near electrical wiring, switches, or appliances, turn off the electricity to that area at your main breaker panel. Safety is paramount.
Minimize Damage:
Open the nearest faucet to drain remaining water from the affected line. Start documenting the damage with photos or videos.
What is the danger of waiting to repair a leaking pipe? Even a small, slow leak can lead to wood rot, compromised structural integrity, black mold growth, and astronomical, unnecessary water bills. Do not delay professional contact.
Don’t want to take any chances? Call John G.
If you have a burst pipe or flooding, call John G. Plumbing Inc. immediately. We provide swift, reliable service to prevent major damage across Nanaimo, Parksville, and the surrounding areas.
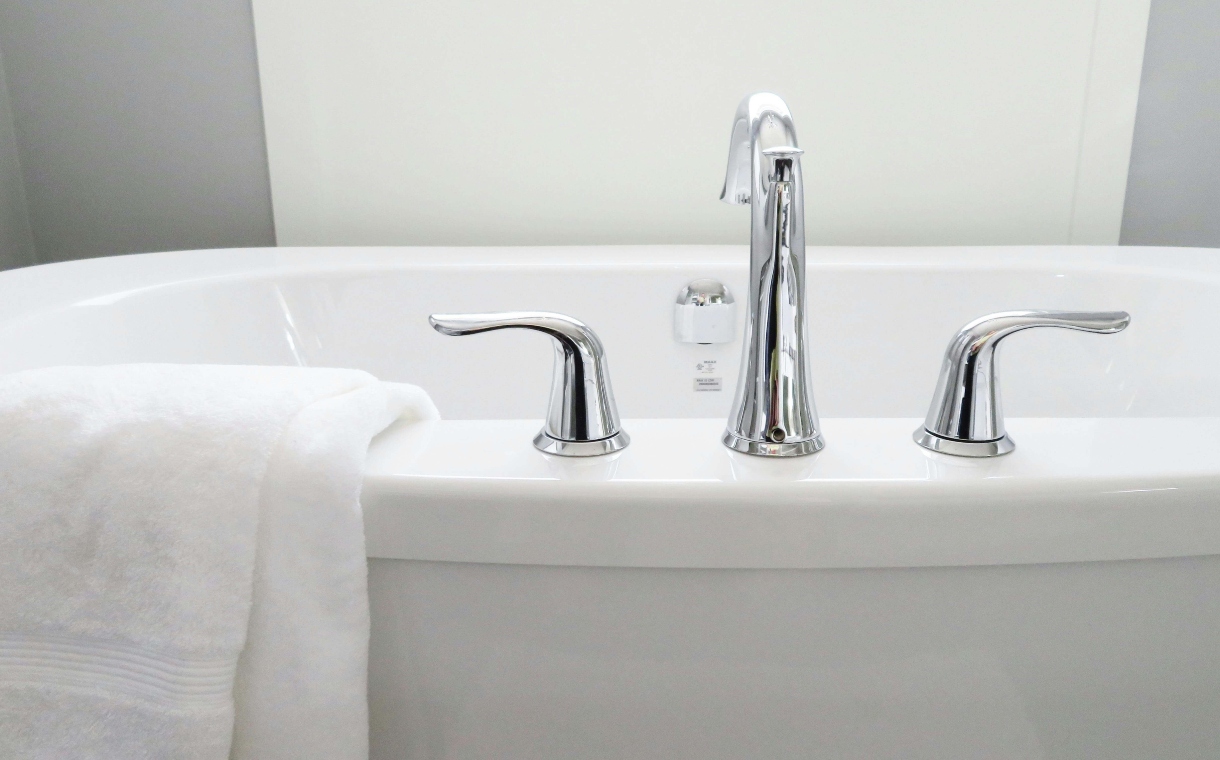
A leaky faucet can lead to a build-up of water and a consistent “tap tap tap” noise that doesn’t stop.
How to Fix a Leaky Faucet (Step-by-Step Guide)
A persistent drip can be more than just annoying; it can waste hundreds of gallons of water per year. The repair often comes down to the type of faucet you have.
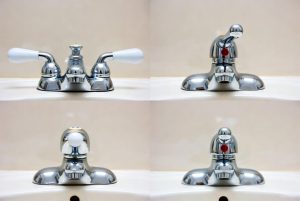
How to identify my faucet type
Wondering what kind of faucet you have? Faucets are categorized by their inner mechanism, which dictates the repair part you need. So, how it is built will determine how it will get fixed.
Faucet types starting from the upper left, going clockwise: compression, cartridge, ceramic disc, and ball.
Faucet Type Identification Guide
Faucet Type
How to Identify It Easily
The Problem Part (What Needs Fixing)
Compression (Older Style)
Two Separate Handles (one for hot, one for cold). You must tighten the handle to stop the water, like turning off a garden hose.
Washers (Small rubber rings inside the handles wear out).
Cartridge (Common Modern)
Single Handle that moves up/down* for water volume and left/right for temperature. Water stops when you move the handle to the OFF position.
Cartridge (A cylinder with movable ports that controls water flow).
Ball (Distinct Design)
Single Handle with a round, ball-shaped cap over the joint. It moves and rotates around the spout. (Usually a difficult, older single-handle design).
Ball Joint Assembly (Multiple small seals and springs inside the mechanism).
Ceramic Disc (Newer High-End)
Single wide, flat handle that moves over a wide arc. They are very reliable and typically have a wide, circular base on the spout.
Ceramic Disks (Two polished ceramic plates that control water flow).
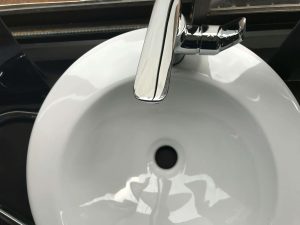
Troubleshooting a leaky faucet handle or spout
First, turn off the water supply under the sink. Disassemble the handle and spout to access the core mechanism. For compression faucets, you likely need a new washer. For cartridge or disk faucets, you will need a matching replacement cartridge.
When is it better to replace the whole faucet instead of repairing it?
If your faucet is old, showing heavy corrosion, or if replacement parts are unavailable or difficult to source, a full replacement is more cost-effective. Sometimes, you just want to update the look!
Schedule a Faucet Installation Estimate with your local plumber in Qualicum Beach or Parksville. Our team can quickly diagnose if a repair is feasible or if you need an upgraded, high-efficiency fixture installed. Call John G. Plumbing Inc at (250) 797-0858. We answer the phone and give an estimate right away for the price and the soonest availability.
Toilets can act up at any time, any day. Be prepared.
How to Silence a Running Toilet and Stop Hidden Leaks
A running toilet is the most common and expensive hidden leak in a home. The sound of water constantly refilling the tank is a signal that money is literally going down the drain. And hey, if you have kids, they’ve likely flushed a toy once or twice. So, let’s help you solve this mystery of the day.
How to check and adjust the flapper or fill valve
The two main culprits in a running toilet are the flapper (the rubber plug) and the fill valve (the mechanism that refills the tank).
1. Check the Flapper (The Rubber Plug)
The flapper’s job is to create a perfect seal to hold water in the tank until you flush. Take the lid off the back of the toilet. The water inside the tank may look perfectly clean, but it can sometimes look discolored or have build-up depending on your home’s water quality. It’s ok to touch!
Once inside, you’ll see a structure connected to a chain, which then connects to a little seal on the bottom.
Look for Slack: Check the small chain connecting the flush handle to the flapper. It needs a little bit of slack. If the chain is too short and tight, it keeps the flapper slightly pulled up, meaning water constantly leaks into the bowl.
Inspect the Seal: Gently lift the tank lid and check the rubber flapper itself. If it looks slimy, warped, or if the rubber is brittle or cracked, it won’t seal properly. This is the most common fix and requires a simple flapper replacement.
2. Check the Fill Valve (The Water Level)
The fill valve (or ballcock) is the main control mechanism inside the toilet tank that manages the water supply. Its primary job is twofold: first, it opens to refill the tank immediately after a flush using water from your home’s supply line. Second, and most critically, it uses an attached float (a cup or arm) to monitor the rising water level and automatically shut off the flow when the water reaches the optimal fill line, which prevents the toilet from continuously running and wasting water.
Fill valve troubleshooting:
Check the Water Height: The water level should be about one inch below the top of the overflow tube (the thin pipe in the center).
Adjust the Float: If the water is too high, it constantly spills down the overflow tube, making the toilet “run.” Locate the float (a cup or arm) and adjust its setting so the fill valve shuts off the water before it reaches that overflow line.
Why does my toilet keep running after replacing the parts?
If you’ve replaced the flapper and fill valve and the toilet still runs, the issue may be more complex. This could indicate a warped or damaged flush valve seat or an issue with the siphon jet. At this point, it’s time for a professional plumber inspection.
How much money can a running toilet cost per month?
A continuously running toilet can waste over 200 gallons of water per day, potentially adding hundreds of dollars to your annual water bill!
Need a New Flapper or Fill Valve Installed? Don’t know, don’t care, just want it fixed?
If your home was built between the 1970s and 1990s, there’s a chance it has Poly-B (polybutylene) piping. Many home insurance providers in Canada no longer cover homes with Poly-B pipes, and some companies may even require proof of pipe replacement before offering a policy.
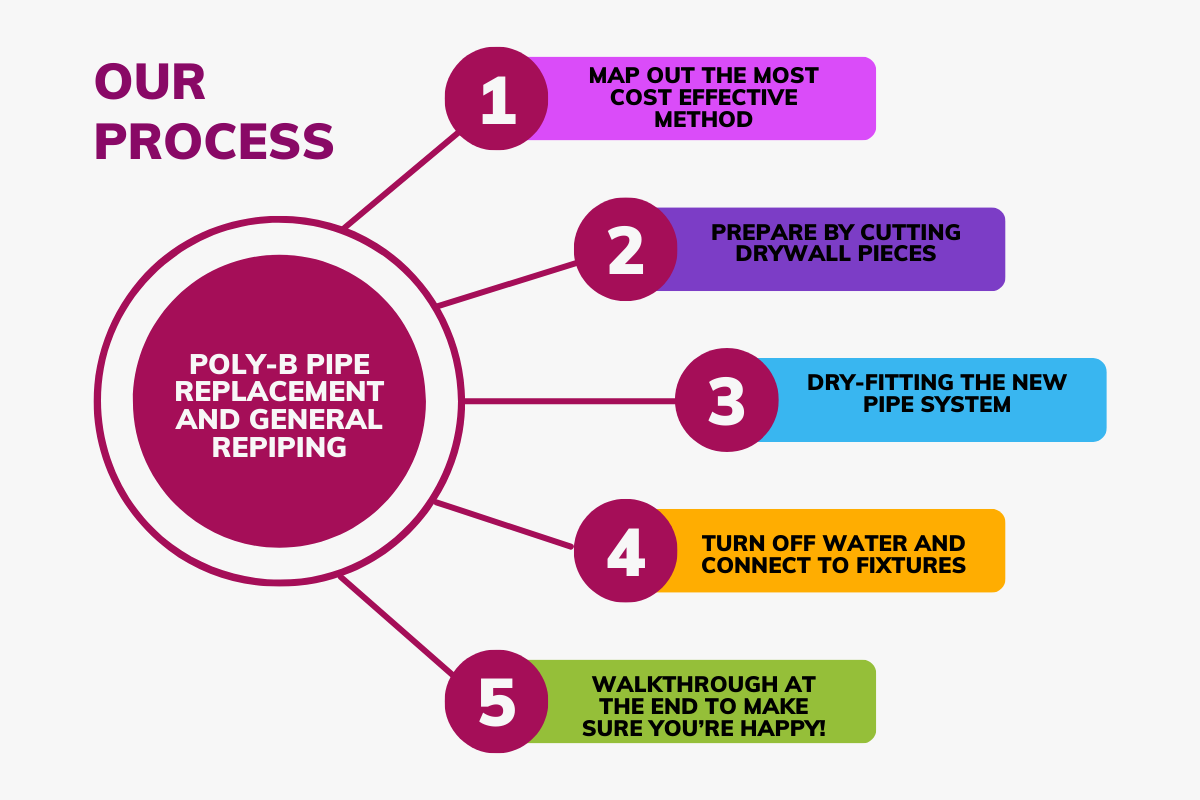
At John G Plumbing, we specialize in Poly-B pipe replacement to help homeowners protect their property, secure home insurance, and prevent costly water damage. Here’s what you can expect from our five-step repiping process:
Step 1: Mapping Out the Most Cost-Effective Method
Before starting, we assess your home’s plumbing system and discuss the best repiping options. Cost to replace Poly-B piping in BC varies based on home size, pipe material (PEX or copper), and labor. We prioritize a cost-effective approach while ensuring your new plumbing system meets Canadian insurance requirements.
Step 2: Preparing by Cutting Drywall Pieces
We carefully cut drywall in necessary areas to access the old Poly-B pipes, minimizing damage for easy repairs. This step ensures an efficient repiping process without unnecessary demolition.
What insurance companies cover Poly-B pipe replacement?
Some insurance providers in Canada will cover part of the repiping cost. Contact your home insurance provider to discuss potential coverage options.
Step 3: Dry-Fitting the New Pipe System
Before making any permanent changes, we dry-fit the new PEX or copper pipes to ensure proper alignment and efficiency. This step is crucial to avoiding future plumbing problems. Poly-B plumbing problems
Poly-B pipes deteriorate over time, leading to leaks.
Insurance companies may refuse coverage for homes with Poly-B piping.
Poly-B lawsuits in Canada have highlighted the risks of this outdated material.
Step 4: Turning Off Water & Connecting to Fixtures
Once we’re ready, we turn off the water, remove the old Poly-B pipes, and install the new plumbing system. Our team ensures all connections are secure before testing for leaks. Replacing Poly-B pipes is the best way to lower your home insurance costs and protect your property from expensive water damage
Can you get homeowners insurance with Poly-B piping?
Many insurance companies in Canada will either:
Deny coverage outright.
Charge higher premiums for homes with Poly-B pipes.
Require a full Poly-B replacement before renewing or issuing a policy.
Step 5: Walkthrough to Ensure Customer Satisfaction
Before completing the project, we do a final walkthrough with you to ensure everything meets your expectations. We also provide documentation of the repiping work, which may help you negotiate better home insurance rates.
Why Repiping Matters
Repiping your home prevents costly leaks, improves water quality, and increases plumbing efficiency. If you’re dealing with low water pressure, discolored water, or frequent pipe leaks, it might be time to consider repiping. Contact Us for a free estimate
Winter is coming, and every homeowner knows the drips of disaster when pipes burst. Avoid the stress of damage and expenses by knowing what to do if pipes burst, how to prevent pipes from bursting, and how to fix them.
Your Water Pipes Burst? Here are your steps to take
Imagine: You hear a loud noise from the basement then come downstairs to see water pouring out of your pipes and flooding everywhere. It looks like a burst pipe, but what do you do?
Step 1: Stay calm.
Step 2: Turn off the main water and power supply. It is dangerous to have electricity and water interact with each other.
Step 3: Locate the damage and try to contain the leak using buckets to collect any additional dripping water.
Step 4: Call John G Plumbing for advice on the next steps and for a professional eye to determine if other pipes are at risk of breaking.
Step 5: Prevent mold and mildew growth. Clean up, open the windows or turn on fans to improve airflow.
Don’t forget the hassle of dealing with insurance claims. Take pictures and document the damage. Dealing with pipes bursting is enough to give you nightmares. However, professionals at John G are here to help get your home back in working order.
Frozen Pipes! How to prevent burst pipes
Have you ever wondered why pipes burst in winter more often than in the summer? Frozen Pipes! Below-freezing temperatures freeze water in the pipes, making it expand. Other reasons include old age, high water pressure, clogs, earthquakes, improper installations and corrosion.
Hence, prevention is key! John G. Plumbing has some quick tips to help you prevent a disaster from happening.
Insulate pipes in unheated or exposed areas, such as crawl spaces, attics, and exterior walls. Use pipe insulation sleeves or wrapping material designed for this purpose.
Set your thermostat to a temperature that will prevent frozen pipes even when outside temperatures drop below freezing.
Inspect your home for any gaps or cracks that could allow cold air to enter near pipes. Seal these openings with caulk or insulation to prevent cold air from reaching the pipes and causing them to freeze.
Before winter arrives, disconnect garden hoses from outdoor faucets. Drain the water from the hoses and store them in a sheltered location. Shut off the water supply to outdoor faucets, if possible, and drain any remaining water from the pipes to prevent freezing.
During extremely cold weather, allow faucets connected to vulnerable pipes (such as those running along exterior walls) to drip slightly. This helps relieve pressure within the pipes, reducing the likelihood of freezing.
A cracked pipe isn’t always obvious
Smaller pipes in the home can burst and take a little longer to identify as they don’t carry the high water pressure of a main water line. These leaks can often go unnoticed for weeks, or even months, depending on where they are located.
Here are some signs that smaller pipes may have already burst in your home:
Random puddles of water in your home.
A higher-than-usual water bill, despite no increase in usage.
Yellowish stains or spots on walls and ceilings.
Noticeably reduced water pressure.
Repairing Pipes- is fixing an option?
Fixing burst pipes is best left to a professional plumber, but you can make emergency repairs if applicable. Repair sleeves can temporarily reinforce the pipe to be able to run water through it. You can also patch it with a piece of rubber, place a wood block over it or use a clamp and clamp it all together. These are all temporary fixes if you are unable to have a plumber arrive immediately to check things out.
Temporary solutions can initiate further damage if not treated properly. It is best to call our licensed plumbers at John G. Plumbing for a reliable inspection, repair, and replacement if necessary.
Don’t Let a Burst Pipe Ruin Your Day!
Think you might have a hidden leak in your home? Don’t wait until it becomes costly! Keep an eye out for these signs, and if a disaster happens, contact John G. Plumbing for repair.


)